No More Drips! Vessel Sink Installation Tips from Someone Who's Been There
Oh hey there! So you've got yourself a gorgeous vessel sink for your bathroom sanctuary? Great choice! These beauties sit right on top of your counter like a piece of functional art. it looks amazing but the installation journey had a few puddles along the way.
Let me share some practical wisdom to help you create a leak-free haven, because nothing ruins your morning ritual faster than water damage. Trust me on this!
Two Ways to Make Your Sink Feel at Home
Your vessel sink, whether it's a small washbasin or a wide one, can live on your counter in one of two ways:
Sitting Pretty on Top: The whole sink rests on your counter like a bowl. Adds about 6 inches of height (perfect for my tall husband, though I need to stand on my tiptoes sometimes). Great for glass sinks or uniquely shaped vessels—I almost bought this copper one that looked like a leaf, but then got distracted by the marble options.
Partially Nestled In: The sink sits partly recessed in a hole. More stable and a bit more forgiving if installation isn't perfect. Works best with round, bowl-shaped sinks made from stone, ceramic, or similar materials.
Prep Work Makes Dream Work (Most of the Time)
Before diving in, take a moment to plan, which I admit isn't my strongest skill. but Anyway!
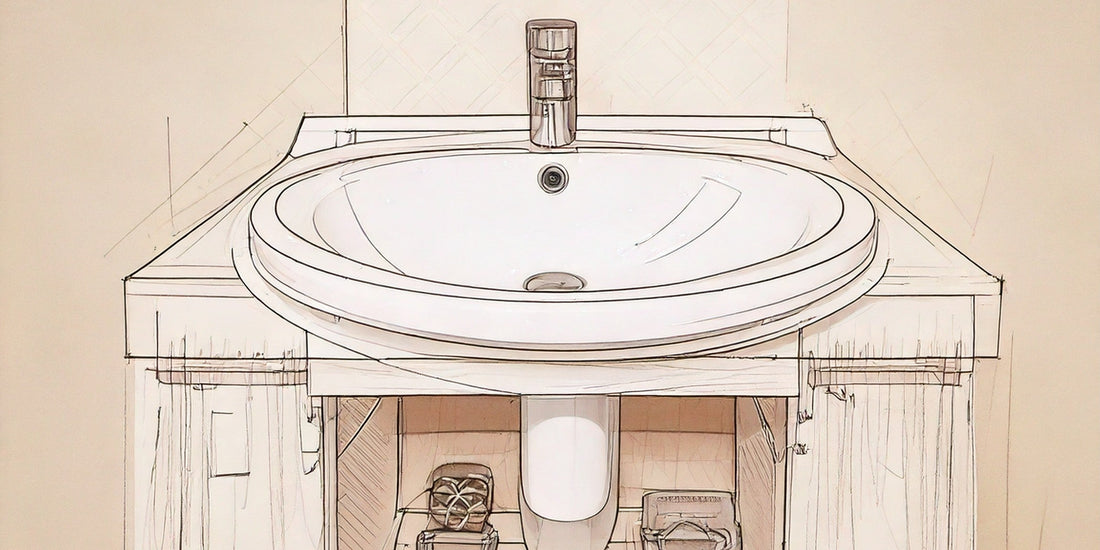
Place your sink on the counter where you imagine using it each morning. Is there enough space behind it (about 4-5 inches) for your faucet? Can you comfortably wash your face without bumping your elbows on things? Mark the center of where your drain will go—this little mark is surprisingly important.
Gather these tools before starting:
- Safety glasses (learned this one the hard way)
- Measuring tape
- Pencil
- Drill with hole saw
- Silicone sealant for bathrooms
- Wrench and pliers
- Something to clean up with—oh, and definitely have some acetone or denatured alcohol handy for wiping away excess sealant
Also check your plumbing situation. Any leaks or issues now? Fix those first! Much easier before your beautiful new sink is in the way.
The "Hole" Story
Getting the drain opening right is very important. For most vessel sinks, you'll need about a 1¾" to 2" diameter hole in your countertop.
Use a hole saw with your drill for the cleanest cut. I tried using a jigsaw on my first attempt once... well, let's just say the countertop needed professional help afterward.
Clean the area thoroughly after cutting. Dust is the enemy of good sealant adhesion!
Silicone or Putty? The Great Debate
For a watertight seal, you've got few options:
Silicone Sealant: Creates a flexible and a waterproof seal that handles the steamy bathroom environment pretty well. It's my go-to for most installations.
Plumber's Putty: Has a nice clay-like consistency and works well between metal components.
For your vessel sink, high-quality waterproof silicone designed for bathrooms is usually your best bet. Just don't get the kind you might accidentally buy that will smell like vinegar for three days!
Putting It All Together
Now for the fun part—assembly! Though I always seem to have an extra part leftover... hopefully that's not important?
-
Attach the drain to your sink first before putting anything on the counter. This sequence matters! I tried doing both at once on my first attempt and created a leaky mess.
-
Apply sealant in a continuous bead around the bottom edge of your upside-down sink. Not too much (messy) and not too little (leaky).
-
Center your sink carefully over the drain hole and press down firmly.
-
Add a small bead of sealant where the sink meets the counter for extra protection.
-
Clean up excess sealant immediately. Once that stuff dries, it's stubborn as my cat when it's bath time.
-
Now wait! The hardest part, honestly. Let the sealant cure completely—usually 24 hours. I know you're excited to use your new sink (I couldn't wait either), but trust me, patience here prevents puddles later.
Plumbing Connections That Stay Dry
After everything's cured:
-
Connect the P-trap to your drain tailpiece. Make sure there's a slight downward slope toward the waste pipe—water should flow away, not hang around.
-
Use plumber's tape on threaded connections for extra leak protection. This stuff is magic
-
Most vessel sinks work best with deck-mounted faucets that install directly into your countertop. Position yours to direct water into the center of your sink to avoid splashing your carefully chosen hand towels.
The Ultimate Test
Time to make sure everything stays dry where it should:
-
Turn on the water and check all connections. Look underneath while the water's running (a flashlight helps here).
-
Fill the sink completely, then drain it while watching underneath.
-
The overnight test: My favorite trick—place dry paper towels under all connections before bed. Check in the morning—if they're still dry, you've done everything right!
Creating your personal bathroom retreat doesn't need to include unexpected water features on your floor or cabinet. With these tips, your vessel sink will be that perfect peaceful spot for your morning and evening rituals—no leaks, just calm moments to start and end your day.
One last I should probably mention—take pictures when you're done! You'll want to share your handiwork... and remember what the plumbing looked like if you ever need to fix something later.